

CRUD機能を【Laravel8系】で作ってみる。 ダミーデータ入力
↑前回はダミーデータを入れたので今回はダミーデータを全て出力(一覧)するようにしてみましょう!
前回に引き続き以下ブログ参考にさせていただいています。
Livewire componentの作成
php artisan make:livewire Students
Code language: CSS (css)
Making Components
↑コマンドの説明
ここでLIvewireのComponentを作成します。
app/Http/Livewire/Students.php

<?php

namespace App\Http\Livewire;

use App\Models\Student; //追加分
use Livewire\Component;

class Students extends Component
{
    public function render()
    {
        $students = Student::orderBy('id', 'DESC')->get(); //studentのidを全件取得
        return view('livewire.students.index', compact('students')); //取得したstudentをviewに渡す。
    }
}
Code language: HTML, XML (xml)
studentsの情報をmodelで取得してきます。
そしてviewに渡します。
そして、bladeを書いていきましょう!
その前にwindcssを使うのでこちらを確認ください。
インストールができたらbladeです。
と、その前にlivewireディレクトリを整理しましょう。
ということでresources/views/livewire/でstudentsというディレクトリを作成します。
mkdir students
そこで書いていきましょう。
resources/views/livewire/students/index.blade.php

<div>
    <div class="rounded overflow-hidden shadow-lg">
        <div class="px-6 py-4">
            <div class="font-bold text-xl mb-2">生徒一覧</div>
        </div>
        <div class="px-6 pt-4 pb-2">
            <table class="table-auto w-full">
                <thead>
                    <tr>
                        <th class="px-4 py-2">名前</th>
                        <th class="px-4 py-2">苗字</th>
                        <th class="px-4 py-2">メールアドレス</th>
                        <th class="px-4 py-2">電話番号</th>
                        <th></th>
                        <th></th>
                    </tr>
                </thead>
                <tbody>
                    @foreach ($students as $student)
                        <tr>
                            <td class="border px-4 py-2">{{ $student->firstname }}</td>
                            <td class="border px-4 py-2">{{ $student->lastname }}</td>
                            <td class="border px-4 py-2">{{ $student->email }}</td>
                            <td class="border px-4 py-2">{{ $student->phone }}</td>
                            <td class="border px-4 py-2">編集</td>
                            <td class="border px-4 py-2">削除</td>
                        </tr>
                    @endforeach
                </tbody>
            </table>
        </div>
    </div>
</div>
Code language: HTML, XML (xml)
今回のポイントは@foreach ($students as $student)ここですね。foreachで取得してきた生徒の情報を出力していきます 。
@foreachに関してはこちら→繰り返し
そしてこれを既存のdashboardに表示できるようにします。
resources/views/dashboard.blade.php

<x-app-layout>
    <x-slot name="header">
        <h2 class="font-semibold text-xl text-gray-800 leading-tight">
            {{ __('Dashboard') }}
        </h2>
    </x-slot>

    <div class="py-12">
        <div class="max-w-7xl mx-auto sm:px-6 lg:px-8">
            <div class="bg-white overflow-hidden shadow-xl sm:rounded-lg">
                <livewire:students/>
            </div>
        </div>
    </div>
</x-app-layout>
Code language: HTML, XML (xml)
livewire:students
↑ここの記述でLivewireのapp/Http/Livewire/Students.php componentを呼んでいます。
そしてrenderメソッドが呼び出されているわけですね。
そこからサーバを起動して確認。
php artisan serve
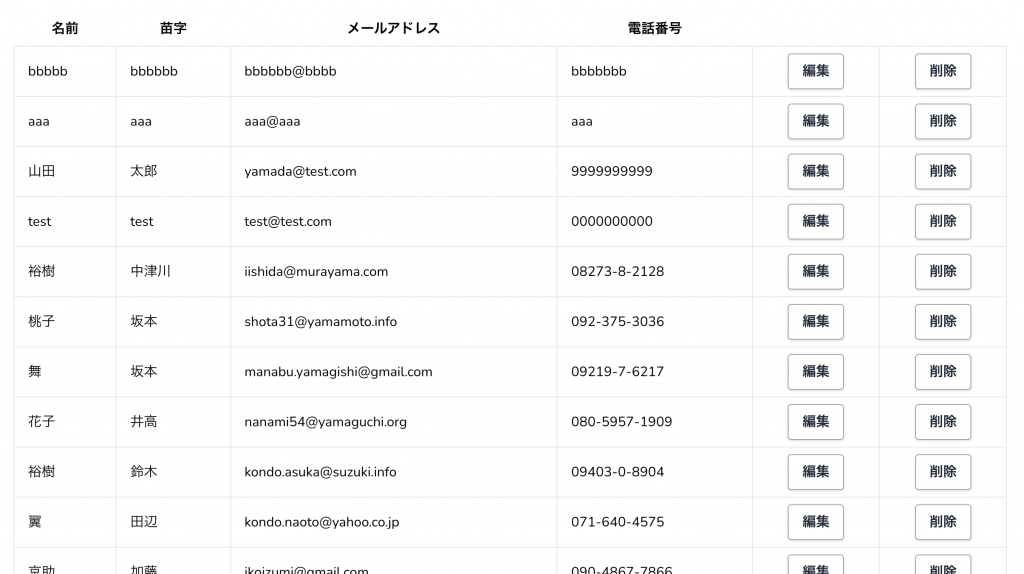
このように全体が表示されたら完璧です!
まとめ
tailwindCSSわかんないからbootstrap使ってもできるようにしよっと。